Self Hosting Kubernetes

I've been watching hosting costs for my hobbies creep up over time and this has motivated me look into self hosting solutions. After thinking about what I need for my projects here's the requirements I set myself:
- It must have the ability to host multiple services
- Cost less than what I'm paying now on AWS
- New services should not increase costs or only increase minimally
- Be able to link them to domains I own in a secure way
- Work with a dynamic IP as my ISP doesn't offer static IPs
Current AWS Costs
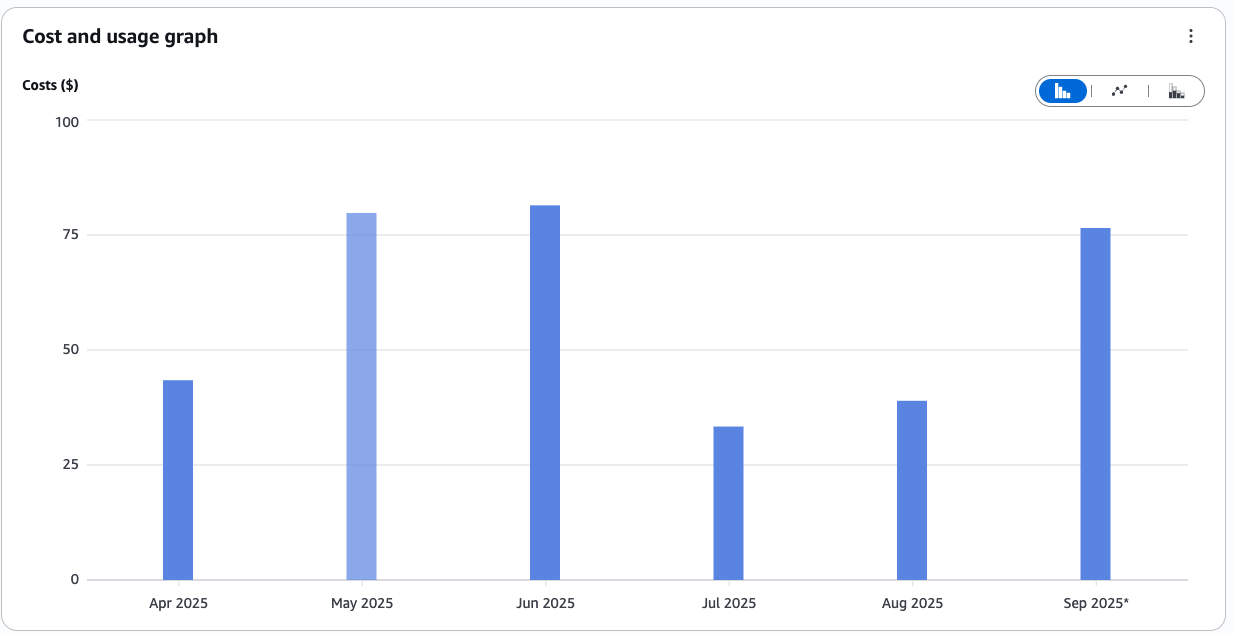
I'm paying around $75 per month for my hobby services, and it's easy to rack up costs. I turn projects off when I'm not developing them and only run a couple of small VMs / containers, one SQL DB at a time and there's network costs and taxes. For the projects I'm planning, if I continue to host them on any cloud provider they will easily go into the hundreds of dollars per month.
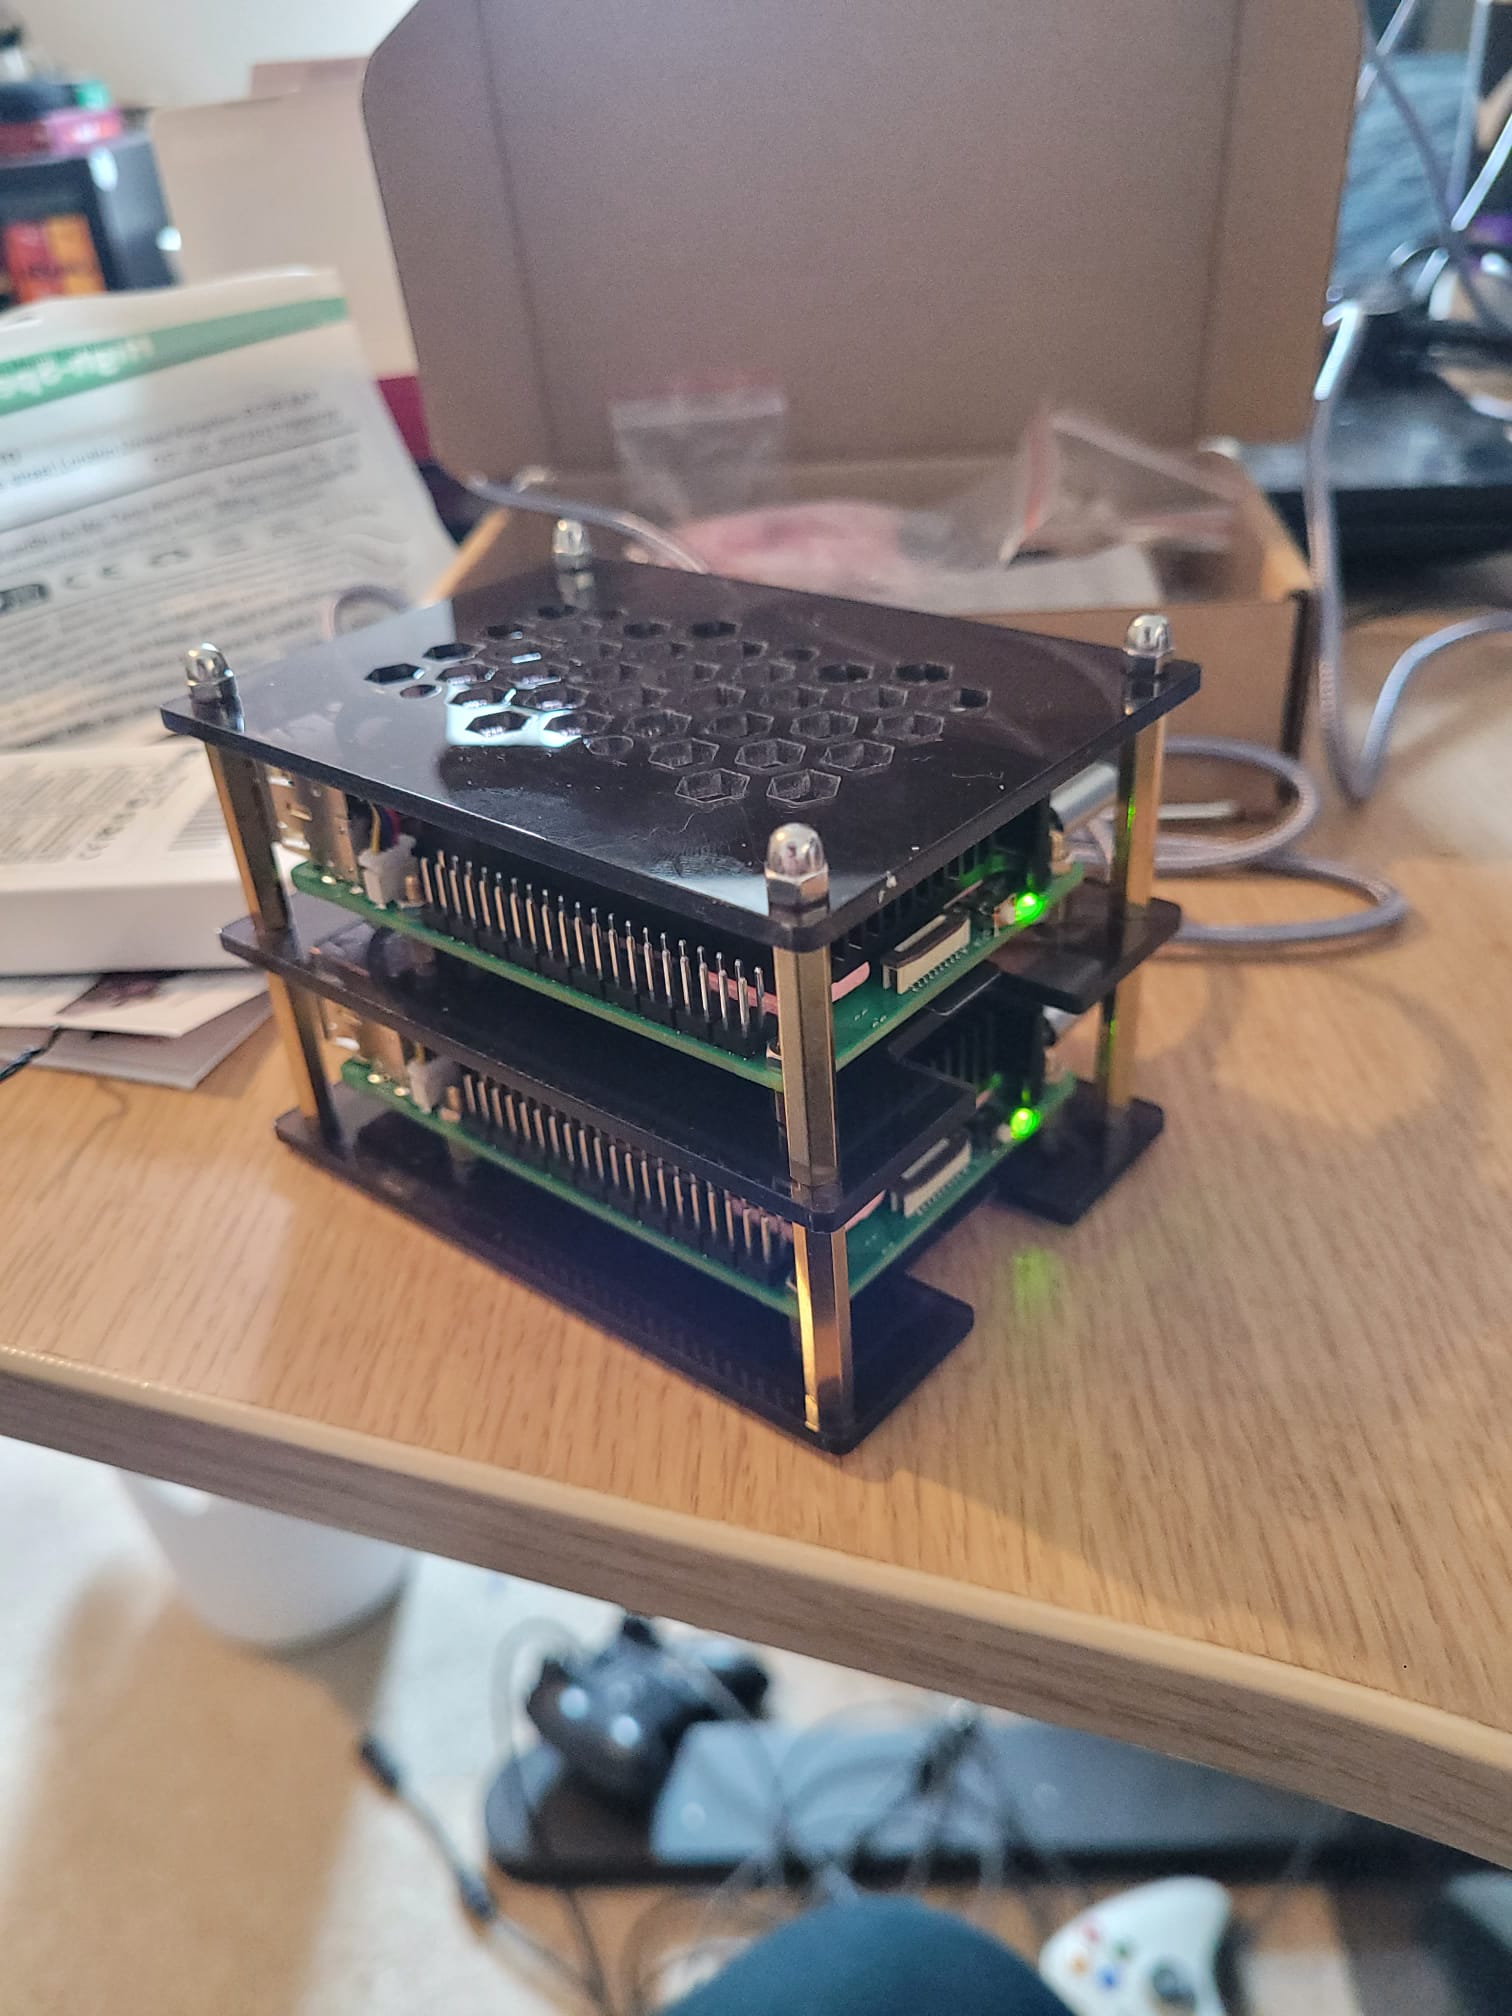
So I decided to build a local raspberry pi cluster, I was able to achieve all my goals and here's what I did to setup it up.
Build a raspberry pi cluster
I followed this youtube video to get it working: Youtube video. I found some parts were out of date so below are the updated instructions.
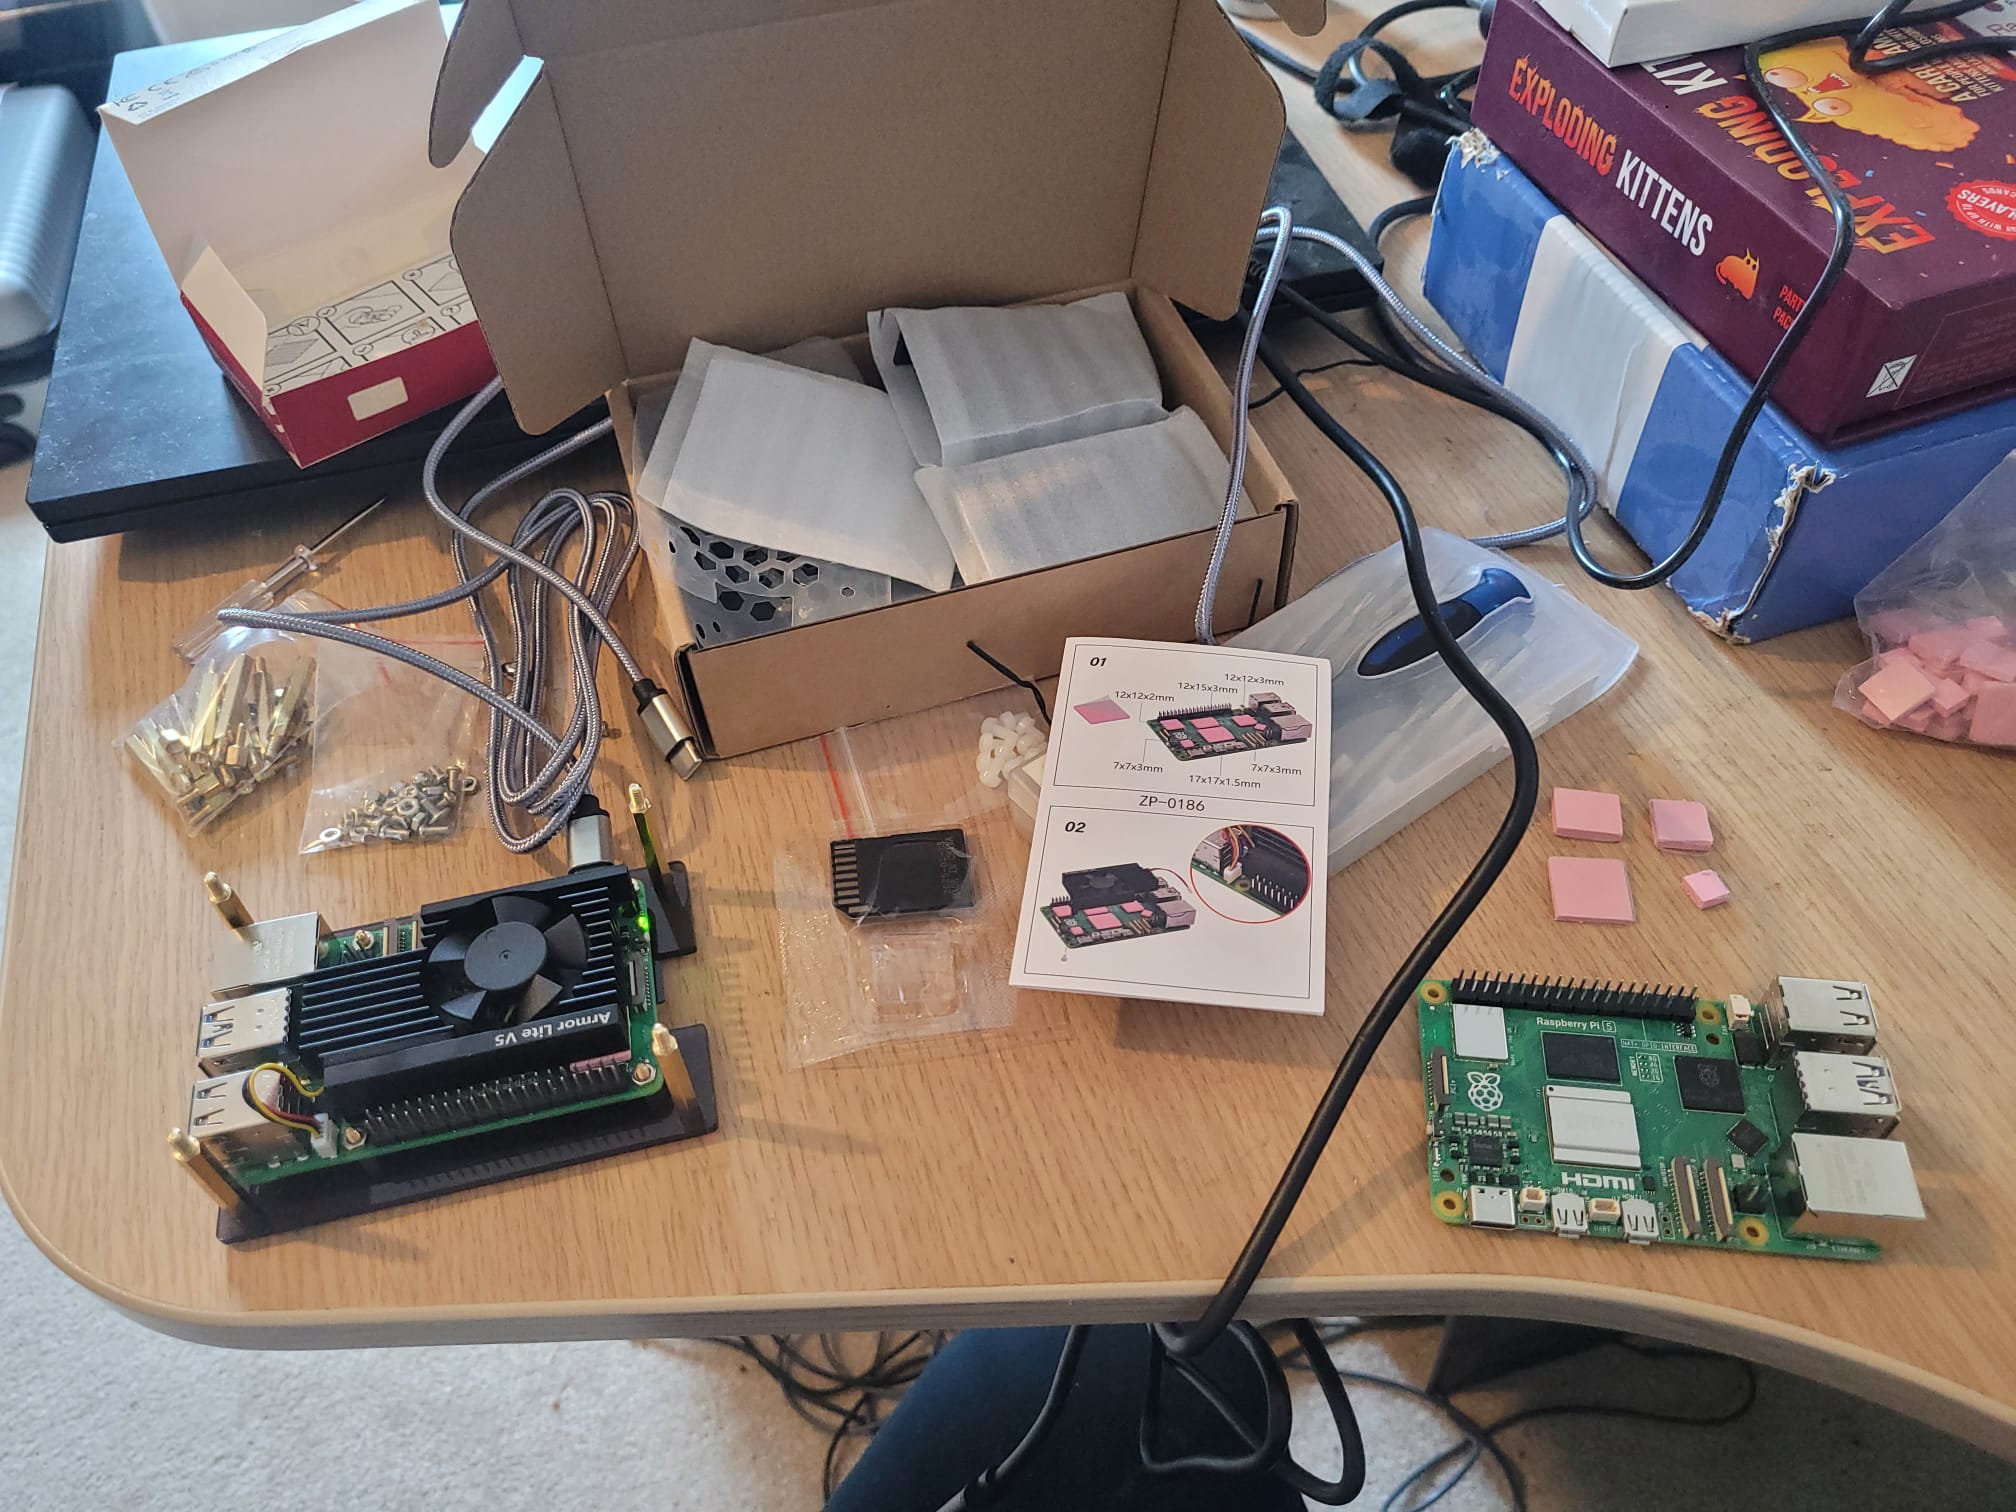
Here's a list of the hardware I used:
- 4x Raspberry Pi 5 8GB
- 4x 64GB SD Cards
- 4x USB to USB C cables
- 1x fast charging hub (needs to be able to supply 5V 5A)
Raspberry Pi Initial Setup

Before we install kubernetes we need to prepare each raspberry pi to be compatible with K3s (simplified kubernetes) and perform the following steps on each raspberry pi:
- Install raspberry pi imager from https://www.raspberrypi.com/software/
- Using the imager flash a new SD card on your computer using the latest raspberry pi OS (64 bit). Set wifi, wifi password and ssh username / password.
- Turn on the raspberry pi and wait for it to boot up.
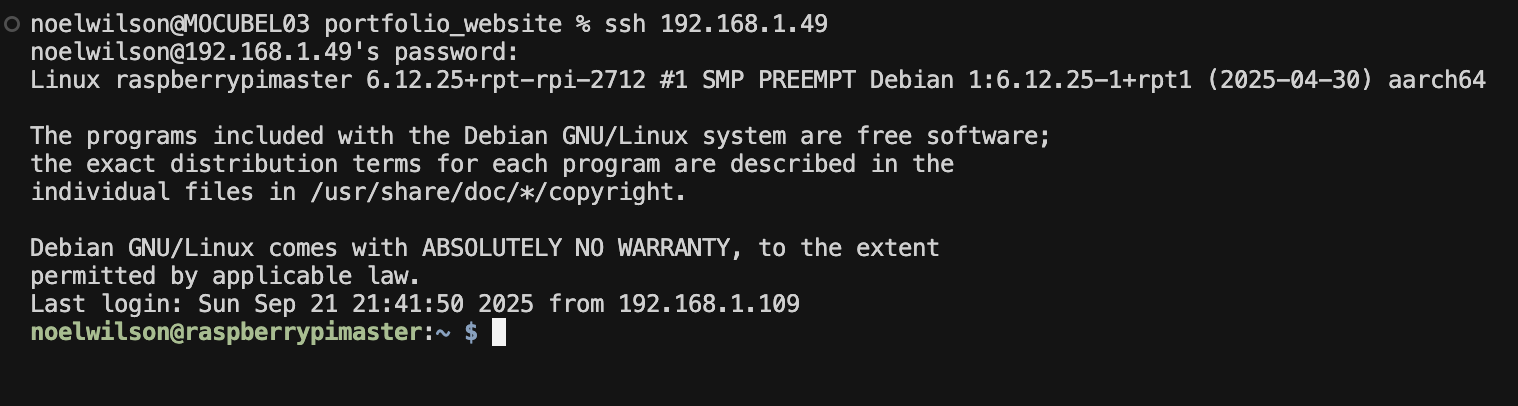
- Find the pi on the local network and ssh into it, E.G.: ssh 192.168.1.49
- On the pi, run: (This is needed for kubernetes to work)sudo echo ' cgroup_memory=1 cgroup_enable=memory' >> /boot/firmware/cmdline.txt
- On the pi, run: sudo apt update && sudo apt install iptables
- Restart the raspberry pi
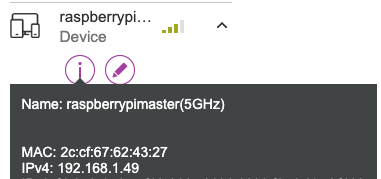
I can now see the raspberry pi on my home router dashboard
Now it's time to install kubernetes, first we need to setup the main / master node which will control the cluster.
K3 installation
- Install K3 master node:
- SSH into the master node and run the following command:
- curl -sfL https://get.k3s.io | K3S_NODE_NAME=rasp-kube-master sh -
- Get master node token so other nodes can join the cluster with:
- SSH into the master node and run the following command:
- sudo cat /var/lib/rancher/k3s/server/node-token
- Install worker K3 nodes (for each worker change node name number):
- SSH into each worker node and run the following command:
- export MASTER_IP=<master-ip>export MASTER_NODE_TOKEN=<master-node-token>curl -sfL https://get.k3s.io | K3S_URL=https://$MASTER_IP:6443 K3S_TOKEN=$MASTER_NODE_TOKEN K3S_NODE_NAME=rasp-worker-01 sh -
Your cluster should now be working, SSH into the master node and run the following command to confirm the nodes are live:
kubectrl get nodes
If you had issues with the cluster, here's the links to the k3s documentation: https://docs.k3s.io/quick-start. Otherwise you should see something like this:
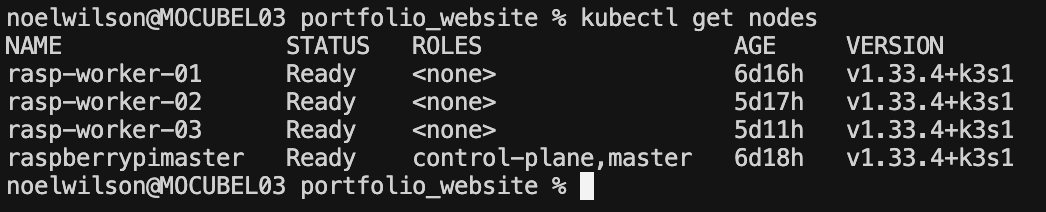
You should now have a working kubernetes cluster!
Local Machine Setup
Next we need to setup authentication for the computer to remove the need to ssh into the cluster. Here's the docs in case you get stuck: https://docs.k3s.io/cluster-access
- Copy master kube config file
/etc/rancher/k3s/k3s.yaml→ local machine~/.kube/config - Modify
~/.kube/configon your local machine, update "server" value to master node IP - Confirm kubectl setup with kubectrl get nodes
Now you can use kubectl to manage the cluster from your local machine.
Secure HTTPS Access
This was the main problem that stopped me in past, I have a dynamic IP and my ISP doesn't offer static IPs. I didn't want to expose my public IP or have to periodically change my DNS settings as my IP address changed. So I looked into exposing a local network service to the internet.
The fall of ngrok
I originally tried using ngrok, this is the gold standard for explosing services in a local network securely, I've used this previously for free. It has since fallen victim to the need to charge as much out of customers as possible. The free tier allows 2,000 requests a month (WTF?) or it cost me $68 per month for 1 endpoint!
So I looked into other options.

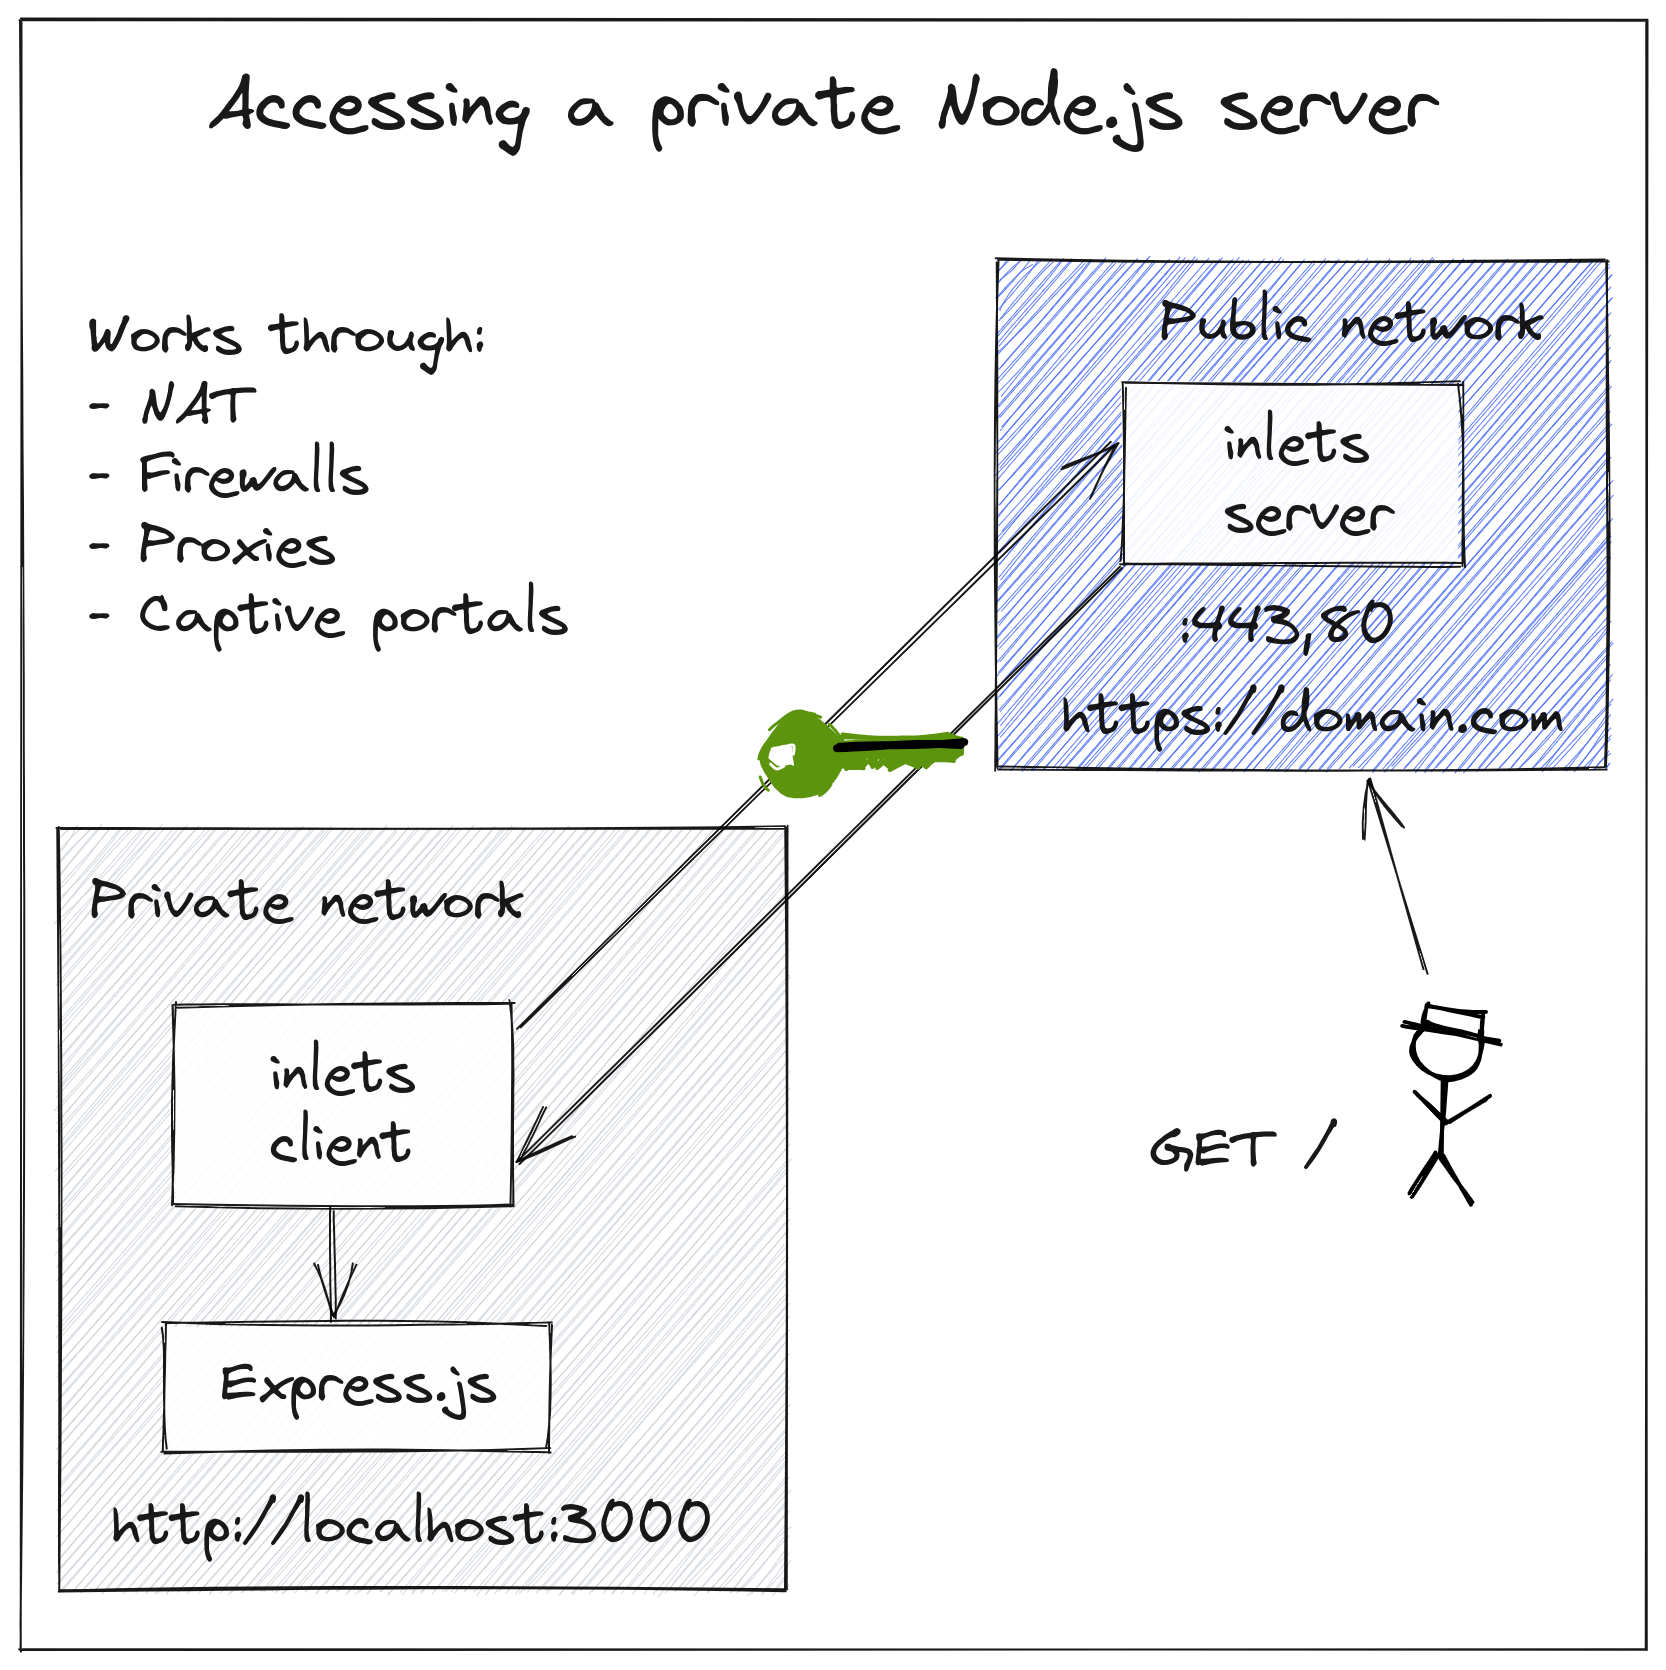
The rise Inlets
- After trawling reddit self hosted solutions, I found Inlets, a much cheaper alternative to ngrok.
- Inlets costs $25 per month for the software.
- The VMs it sets up cost about $10 per month.
- I can have as many endpoints as I want for $35 per month.
Inlets works by creating an ssh tunnel between a local service and a public VM, which is then exposed to the internet.
To get this working I had to get my credit card out to setup:
- A digital ocean account.
- An inlets license, which I think is well worth the $25 a month.
# Digitial Ocean API keyexport ACCESS_TOKEN=$HOME/access-token# Install arkadecurl -sSLf https://get.arkade.dev/ | sudo sharkade install inlets-operator \--provider digitalocean \--region lon1 \--token-file $ACCESS_TOKEN \--license-file "$HOME/.inlets/LICENSE"
This took a bit of time to complete as it needed to:
- Install arkade cli
- Create a VM on digital ocean
- Install the inlets operator on your kubernetes cluster
Kubernetes Ingress + HTTPS Setup
I think this post is getting a bit long so I'll wrap it up, now we have a public IP address to safely access the cluster, the rest of the process is standard kubernetes ingress + https setup. I used the Inlets guide to install nginx ingress + cert manager and it worked great for me to access to multiple services.
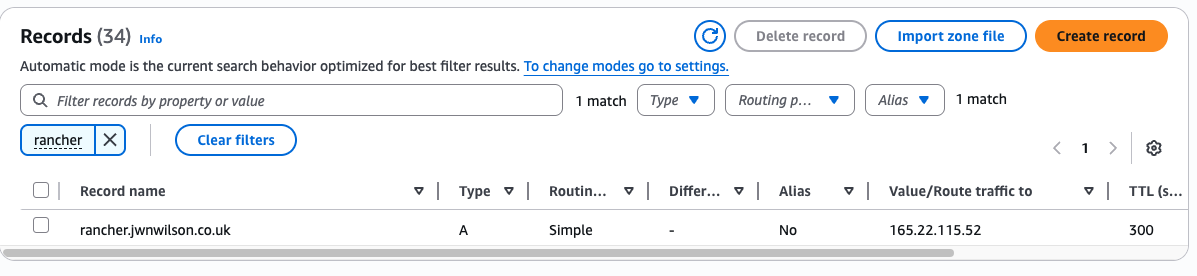
Lastly I used AWS route 53 to point my domains to the public digital ocean IP address, and I quickly setup some great Kubernetes tools:
The outcome
I can now spin up as many services as my raspberry pi cluster can handle, and I can access them from anywhere in the world with a secure HTTPS connection. Here's a list of some great tools I installed to make managing the cluster easier:
- rancher - to manage the cluster
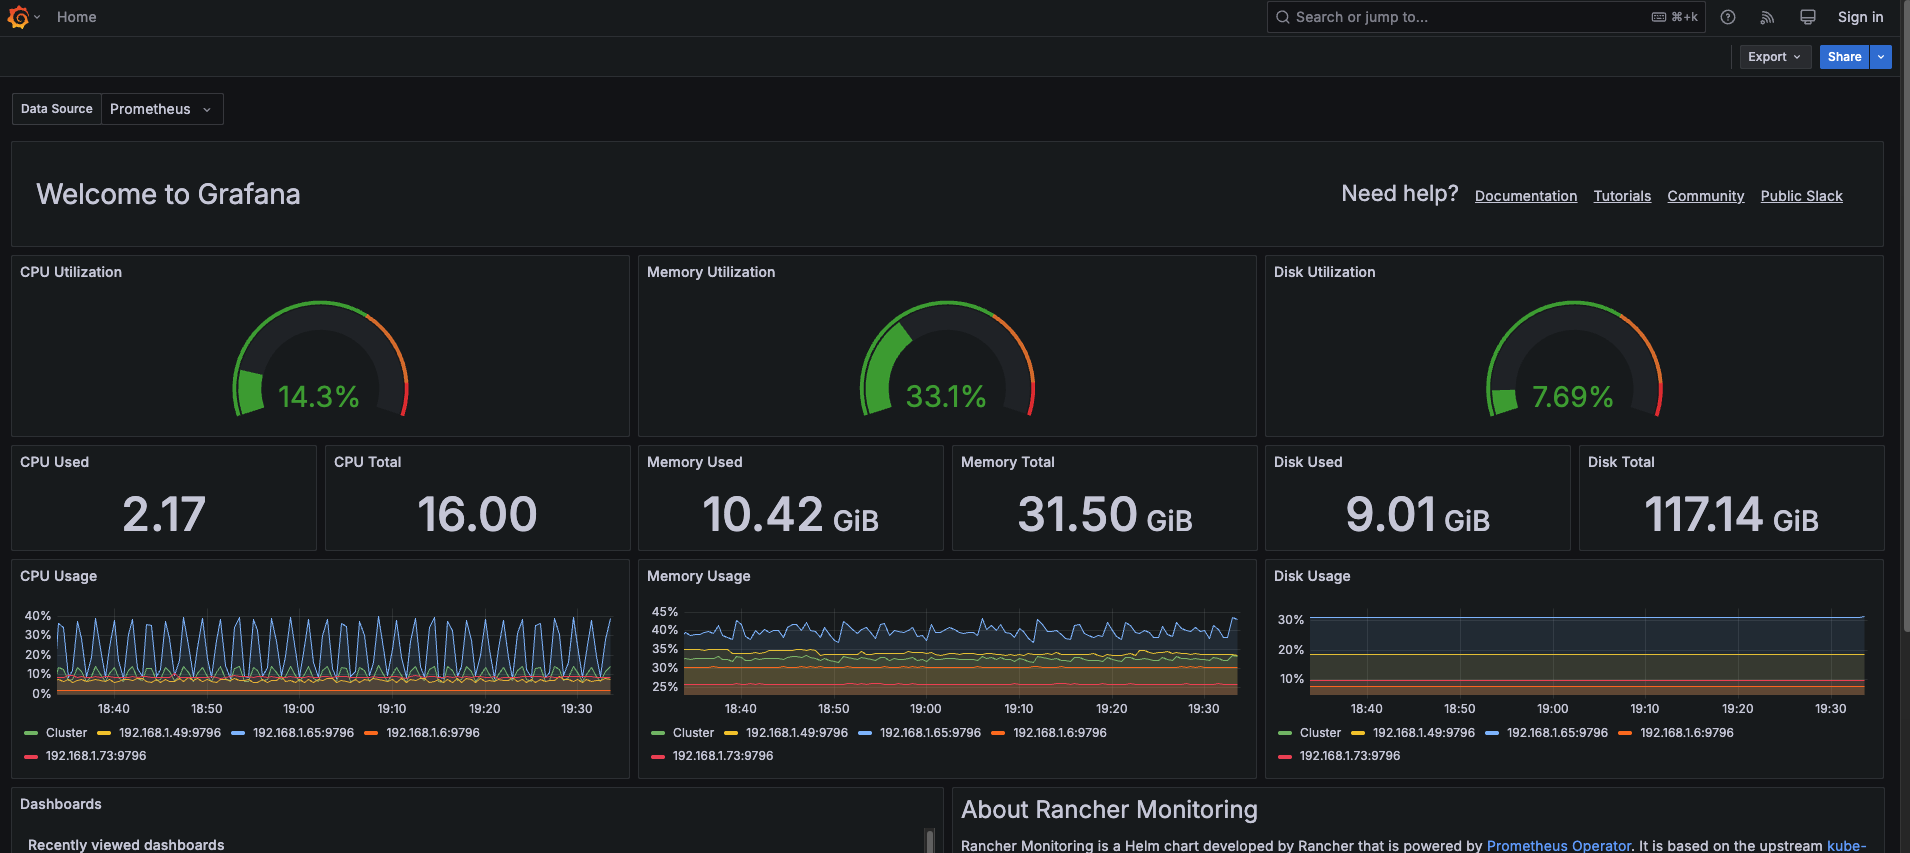
- grafana - to visualize the data
- prometheus - to monitor the cluster
Here's grafana in action accessible from my domain: https://rancher.jwnwilson.co.uk/ monitoring my cluster:
I hope you enjoyed this post, if you have any questions or feedback please let me know.